The Wildix Screen sharing component allows you to share your screen during internal phone calls with other users on your system, attendees of your conference calls on Wizyconf (Business and higher) or guests that chat with you via Kite (Business and higher).
Requirements
- macOS 10.11 or higher
- Windows XP or higher
How to install Wildix Screen sharing component?
- Open Collaboration and sign in with your personal account.
- Go to Settings and select the Extensions tab.
- Press the Install button for the Wildix Screen sharing component.
- Follow the specific installation instruction for your Operating System.
First time use on macOS
Due to Apple's higher security for third-party applications, you need to authorize the use of Wildix Screen sharing component.
- On macOS 10.12 or higher
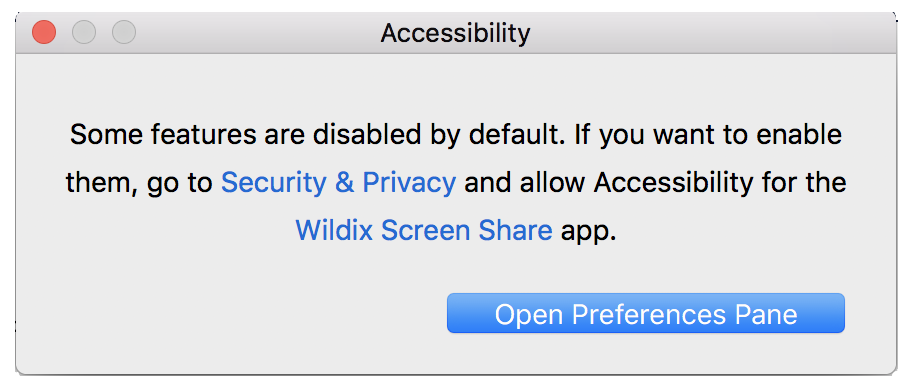
After starting your first screen sharing session you will be prompted with the following notification.
-
Click on Open Preferences Pane and open Security & Privacy tab.
-
Click on the + (plus) icon to add a component to the permissions.
-
Select Wildix Screen Share from your Applications and click Open.
-
-
On macOS 10.15 or higher

-
Click on the top left Apple logo and go to System Preferences.
-
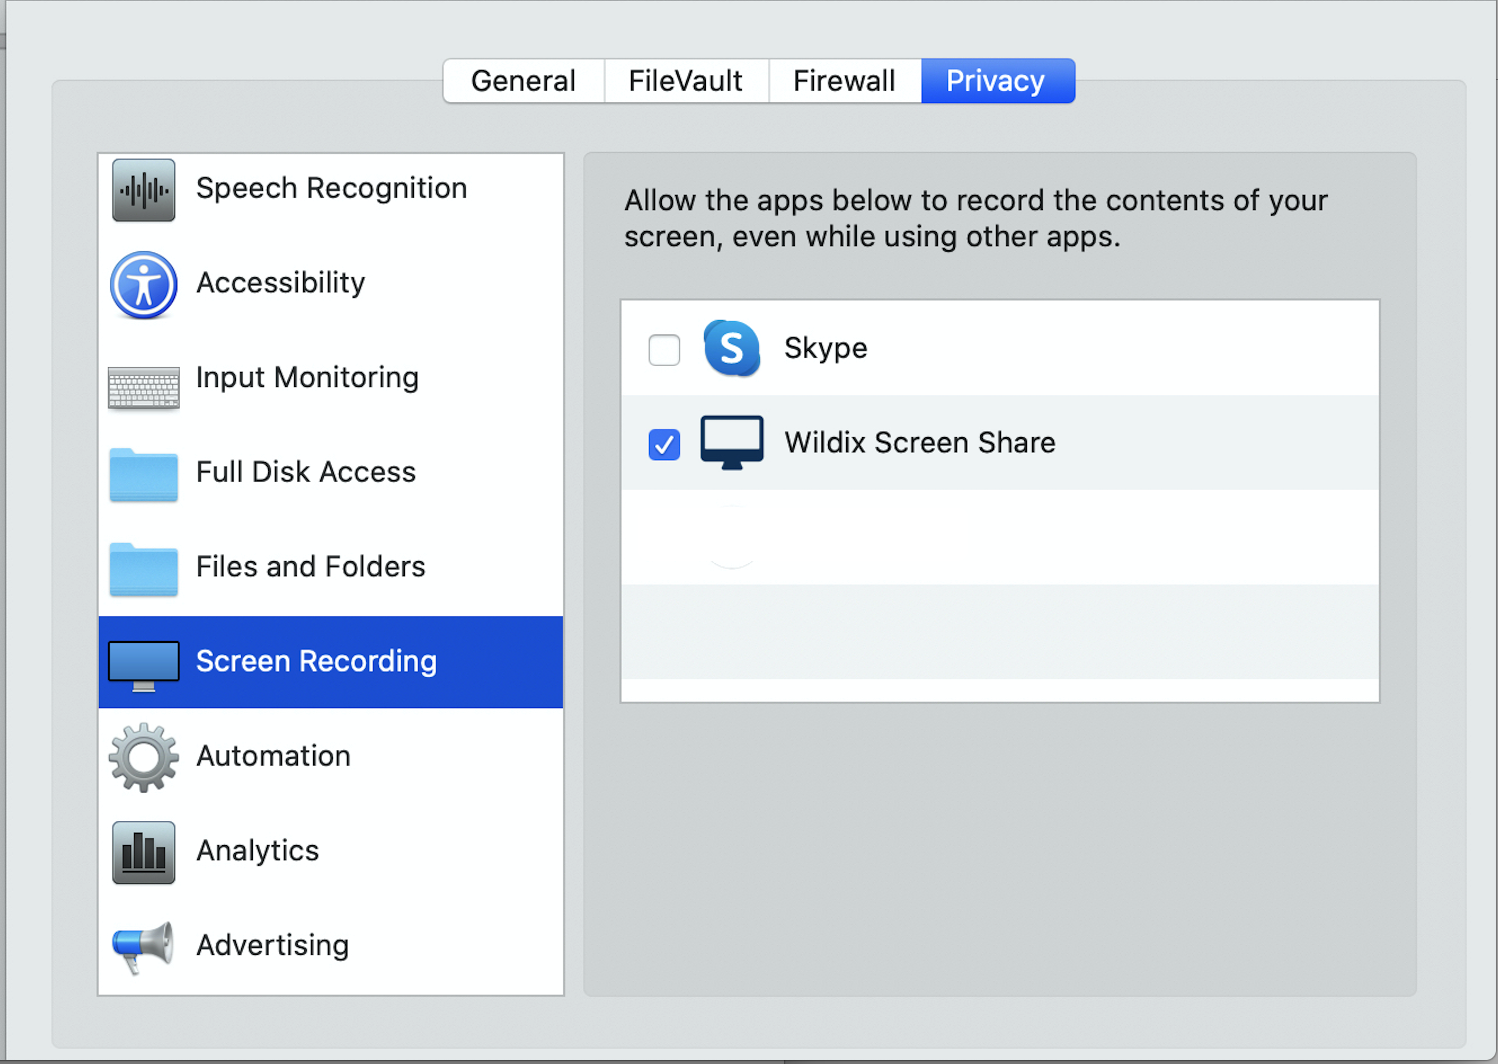
Choose Security & Privacy and open Privacy tab.
-
Select Screen Recording in the left bar and enable Wildix Screen Share.
-
